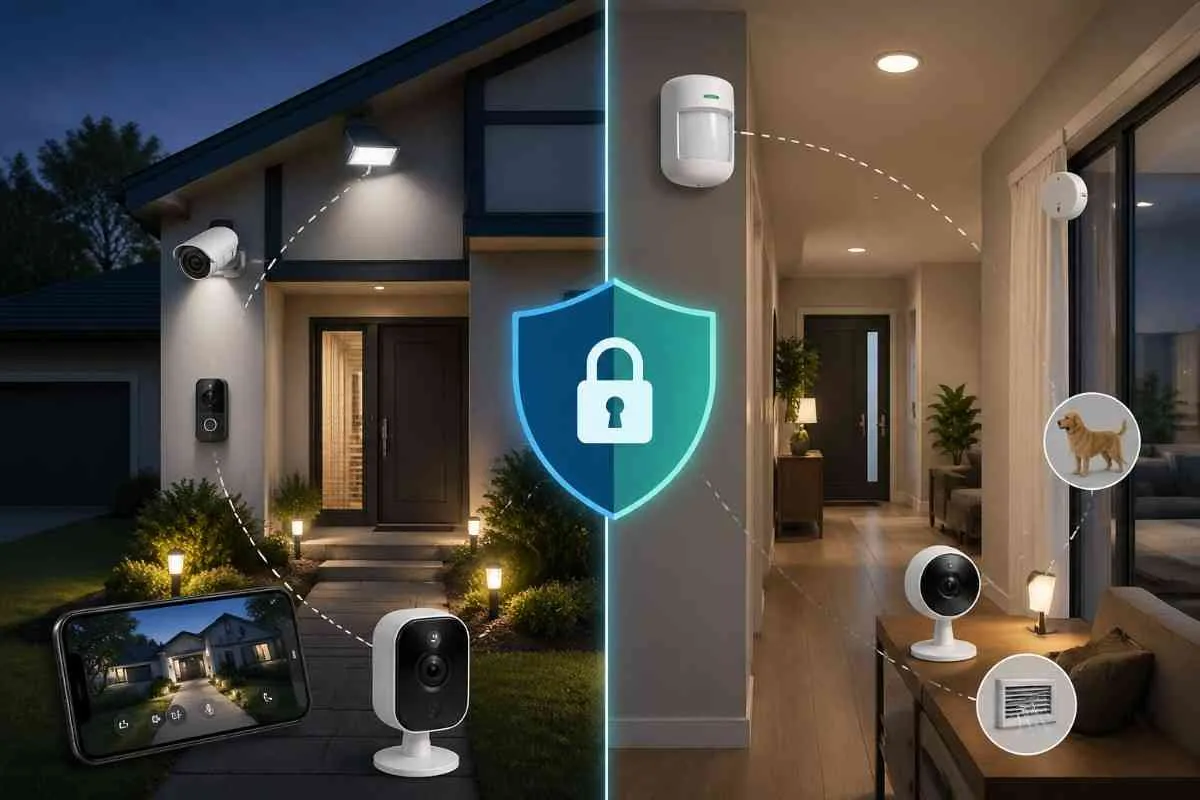
1. Security System Requirements by Home Type
| Factor | Outdoor Security | Indoor Security |
|---|---|---|
| Primary goal | Deter and detect before entry | Detect and alert after entry |
| Core devices | Cameras, floodlights, door sensors | Motion sensors, indoor cameras, glass break sensors |
| Installation | Weather-rated hardware, higher mounting | Standard hardware, lower mounting |
| Privacy concerns | Camera angles must not cover neighbours | Avoid bedrooms and bathrooms |
| False alarm risk | Wind, animals, passing cars | Pets, HVAC heat sources, curtains |
| Budget priority | Outdoor first — higher ROI for deterrence | Indoor adds backup detection layer |
| Best starting point | Video doorbell + 1 outdoor camera | 1 motion sensor in main hallway |
2. Start Outdoors: The Three-Layer Perimeter Approach
Outdoor security works in three layers moving from the outer boundary of your property inward toward the home. Build these in order:
Layer 1: Visibility and Deterrence
Layer 2: Entry Detection
Layer 3: Outdoor Camera Coverage
3. Indoor Security: What the Outdoor Layer Cannot Cover
Indoor security exists to catch what the outdoor layer misses. Two scenarios justify a strong indoor security setup:
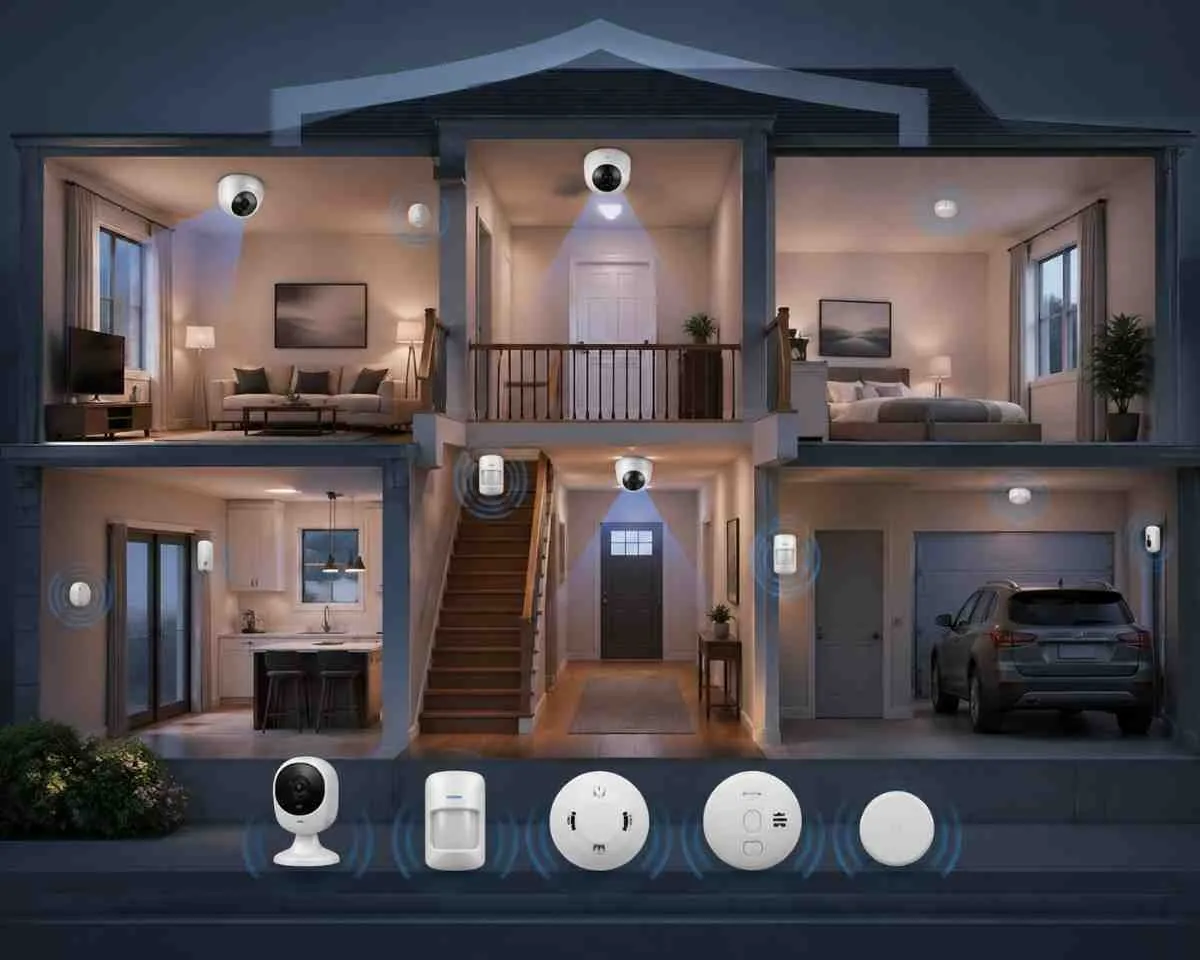
Indoor Camera Placement
- Main hallway : covers movement between entry and all rooms — most important indoor location
- Living room : covers the central area of the home containing high-value items
- Staircase landing : covers movement between floors in multi-story homes
- Do not install cameras in bedrooms, bathrooms, or any space with a reasonable expectation of privacy
Indoor Sensor Placement
- Motion sensors at choke points: main hallway, staircase, garage-to-home entry
- Glass break sensors in rooms with large windows that cannot all be covered by individual window sensors
- Environmental sensors: smoke, CO, and water sensors cover the second major category of home emergencies
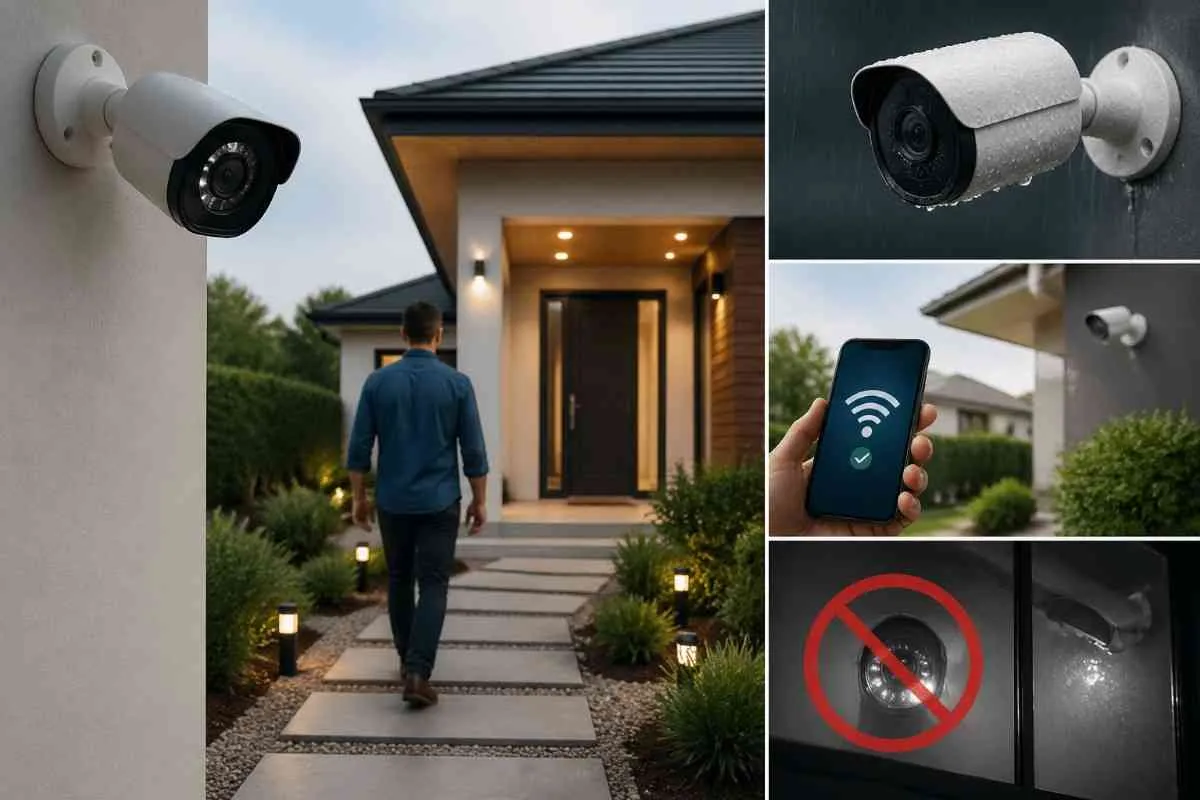
4. Outdoor Camera Placement: Key Rules
Here are the four most important rules for outdoor camera setup. For a full room-by-room camera placement guide including device counts by home size, mounting angles, and indoor vs outdoor decisions, see the dedicated guide linked below.
- Mount at 7 to 9 feet above ground, angled slightly downward toward the approach path for best facial recognition at entry points
- Use cameras rated IP65 minimum for weather resistance. IP66 or IP67 for coastal or extreme weather areas
- Test WiFi signal strength at each planned camera location before mounting. Weak signal means missed footage
- Never mount IR night-vision cameras behind glass windows. IR light reflects back and creates white glare that ruins all footage
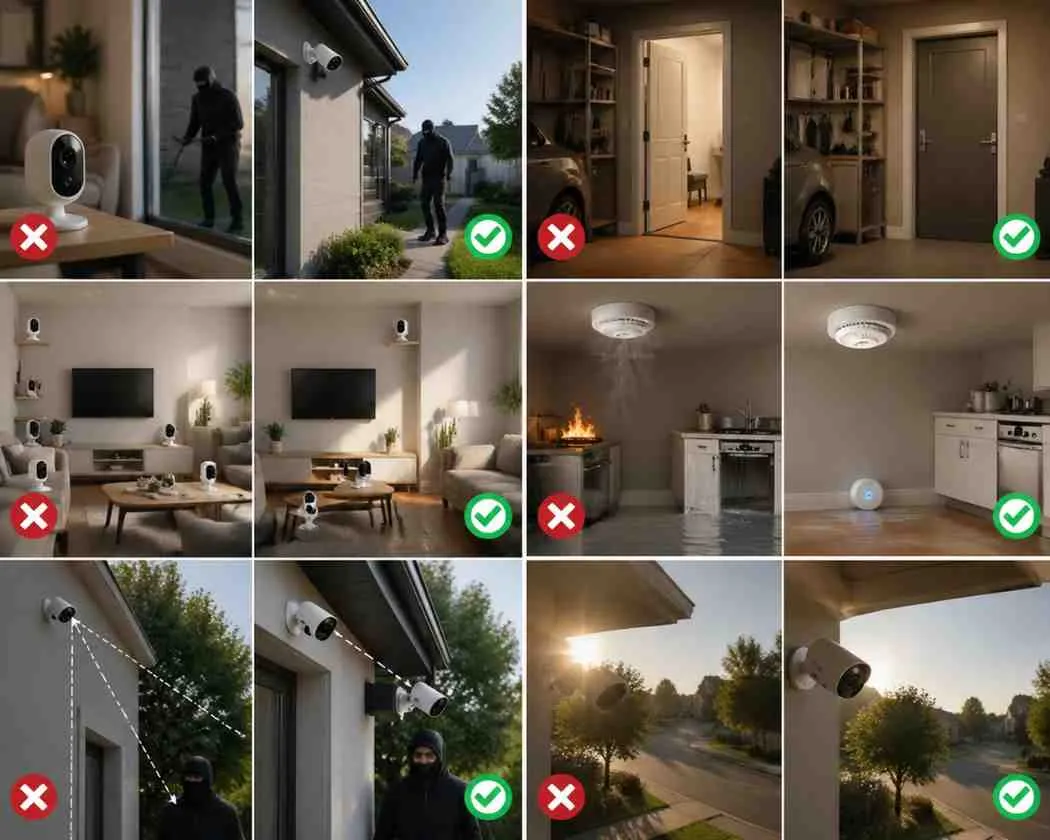
5. Common Indoor vs Outdoor Planning Mistakes
- Starting with indoor cameras instead of outdoor : outdoor deterrence has far higher ROI than indoor detection
- Forgetting the garage interior entry : the door between garage and home is a primary target
- Over-buying indoor cameras : 1 to 2 strategically placed indoor cameras cover most homes adequately
- Neglecting environmental sensors : fires and water leaks cost more than most burglaries
- Mounting outdoor cameras too high : above 10 feet, facial recognition becomes unreliable
- Ignoring camera angle and glare : cameras facing sunrise or sunset produce unusable footage
Frequently Asked Questions
Conclusion
Plan your home security from the outside in. Build your outdoor perimeter first with cameras, motion floodlights, and entry point sensors. Then add indoor motion sensors and cameras as a secondary detection layer. Most US homes need 3 to 5 outdoor devices and 1 to 2 indoor devices to achieve comprehensive coverage. Get the outdoor layer right first and your indoor setup becomes straightforward.
Want a complete indoor and outdoor security plan for your home?
Brocus designs zone-by-zone coverage plans based on your property layout. Free consultation, no pressure.
Get Your Free Security Plan Now